
Recently I've been seeing some really cool book carving art on the Internet, and decided I would try my hand at it. Unfortunately, the experts online weren't spilling any secrets on HOW they made their works of art (seriously, just Google "book carving" and be amazed), so I had to come up with my own method.
First, I selected five victims *cough cough* VOLUMES from an old incomplete encyclopedia set we had lying around.

I then sort of designed in my head what I wanted the landscape to look like (valley with a path and a river). I then sketched out in pencil on the book covers what I wanted to cut out on each volume, and numbered them. I also made sure to number them on the inside cover, down by the spine where it wouldn't get cut out.

From there I cut out the negative space on a band saw. I couldn't cut the curves or change angles too drastically, so I cut it out in triangle-shaped bits and shallow slices.


Before cutting the books I had selected, I grabbed five OTHER books, traced the contours from the other volumes, and rough-cut the sample books on the band saw. Then I arranged those and noted which cuts and angles I would need to alter for the actual books.

After cutting the actual volumes, I set them up in a clamp on the bottom and also along the top to keep the books nice and closed and tight.

I then set about the actual carving by using a dremel. I tried several different bits on a space piece of wood first, and finally settled on a spherical bit with blades that looked like a star from the top. That seemed to take off the most book/wood at once.

This process, the actual shaping of the landscape, was the most time-consuming, and took about 7 hours on and off. The most important thing was that the edges of the books lined up (one book couldn't be taller than another, they all had to flow together). I did the left hills first, carving them down until they were flush, and also giving them a very rugged appearance.


The second day I roughed out the trail that would go through the middle, the river that would come down the third volume, and the hills on the right.


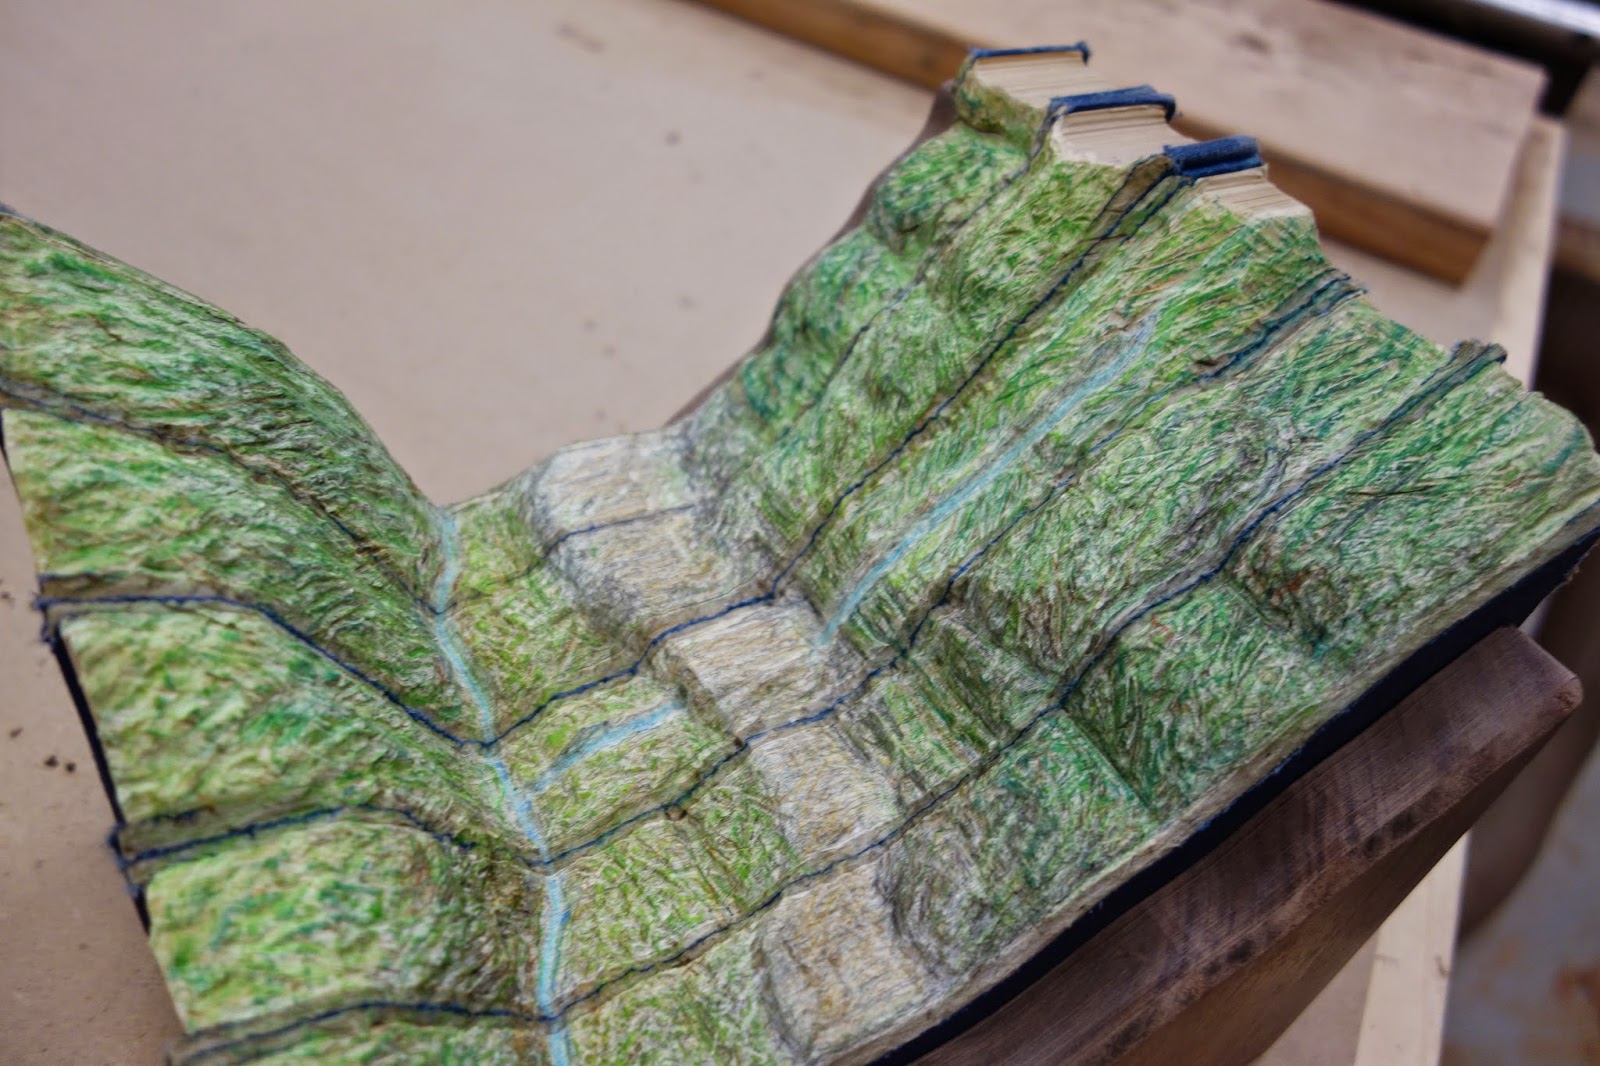
Once I was done smoothing all the books together, it looked like this:

Next I wanted to give some texture to my rugged landscape, so I took a flat circular bit and etched some scratch-like marks into the hills. I also took a drill bit and deepened the ravine where the river would be coming down the hills on the right, flowing underneath the path, and joining the river at the bottom of the hills.

Once I was happy with the way it looked, I set about coloring it. I wanted to avoid water- or oil-based paints (in case they wrinkled the pages or stuck them together), so I experimented on my spare books with several types of media. I ended up using pastels and colored pencil.

And that was all there was to it!

No comments:
Post a Comment